Getting Started with Palpaca

Setting up Palpaca takes about 5 minutes. By the end of this guide, you’ll have your HubSpot account connected, a project deployed, and your CRM schemas fetched — everything you need to start building.
Step 1: Connect your HubSpot account
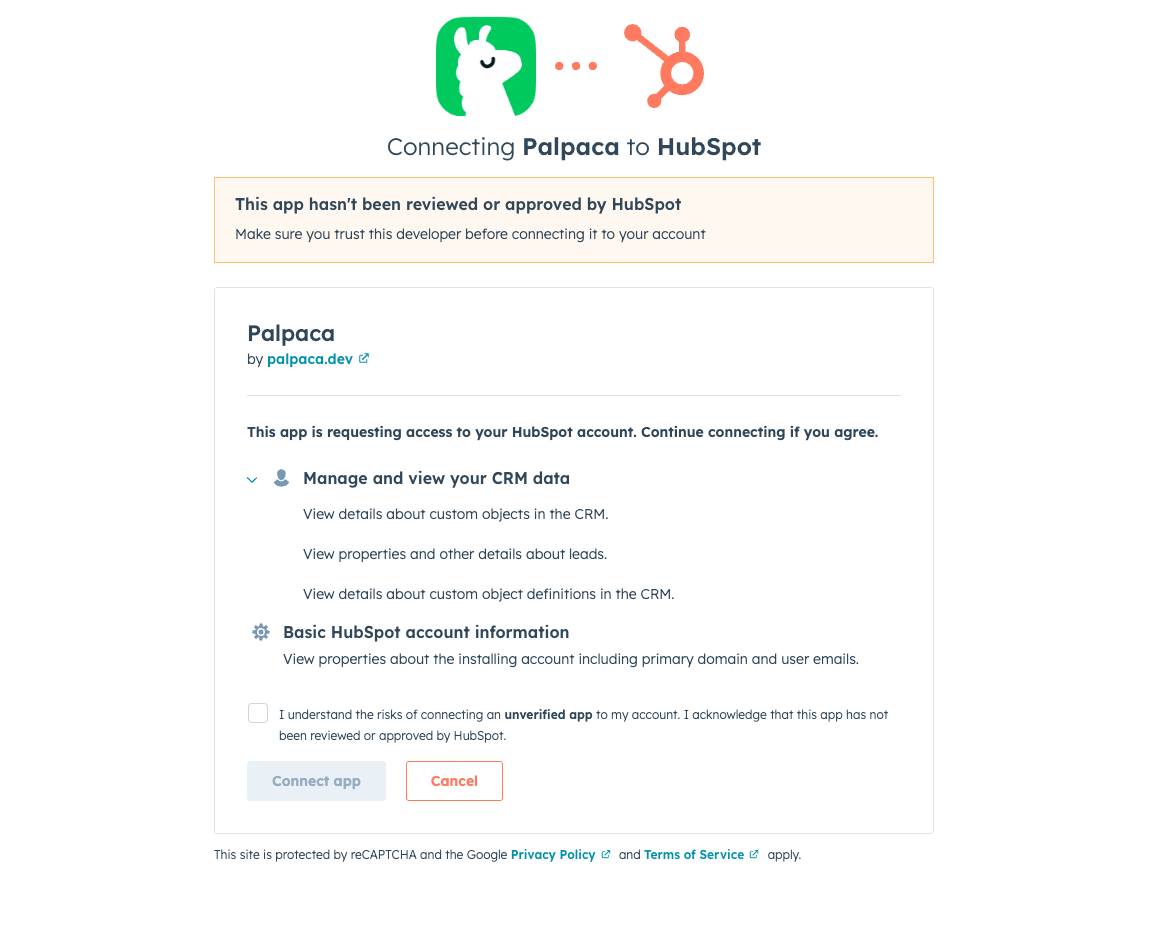
Start by clicking Connect with HubSpot on the Palpaca dashboard. This takes you to HubSpot’s OAuth consent screen, where you’ll authorize Palpaca to access your developer account.
Review the permissions, then click Connect app. HubSpot redirects you back to Palpaca automatically.
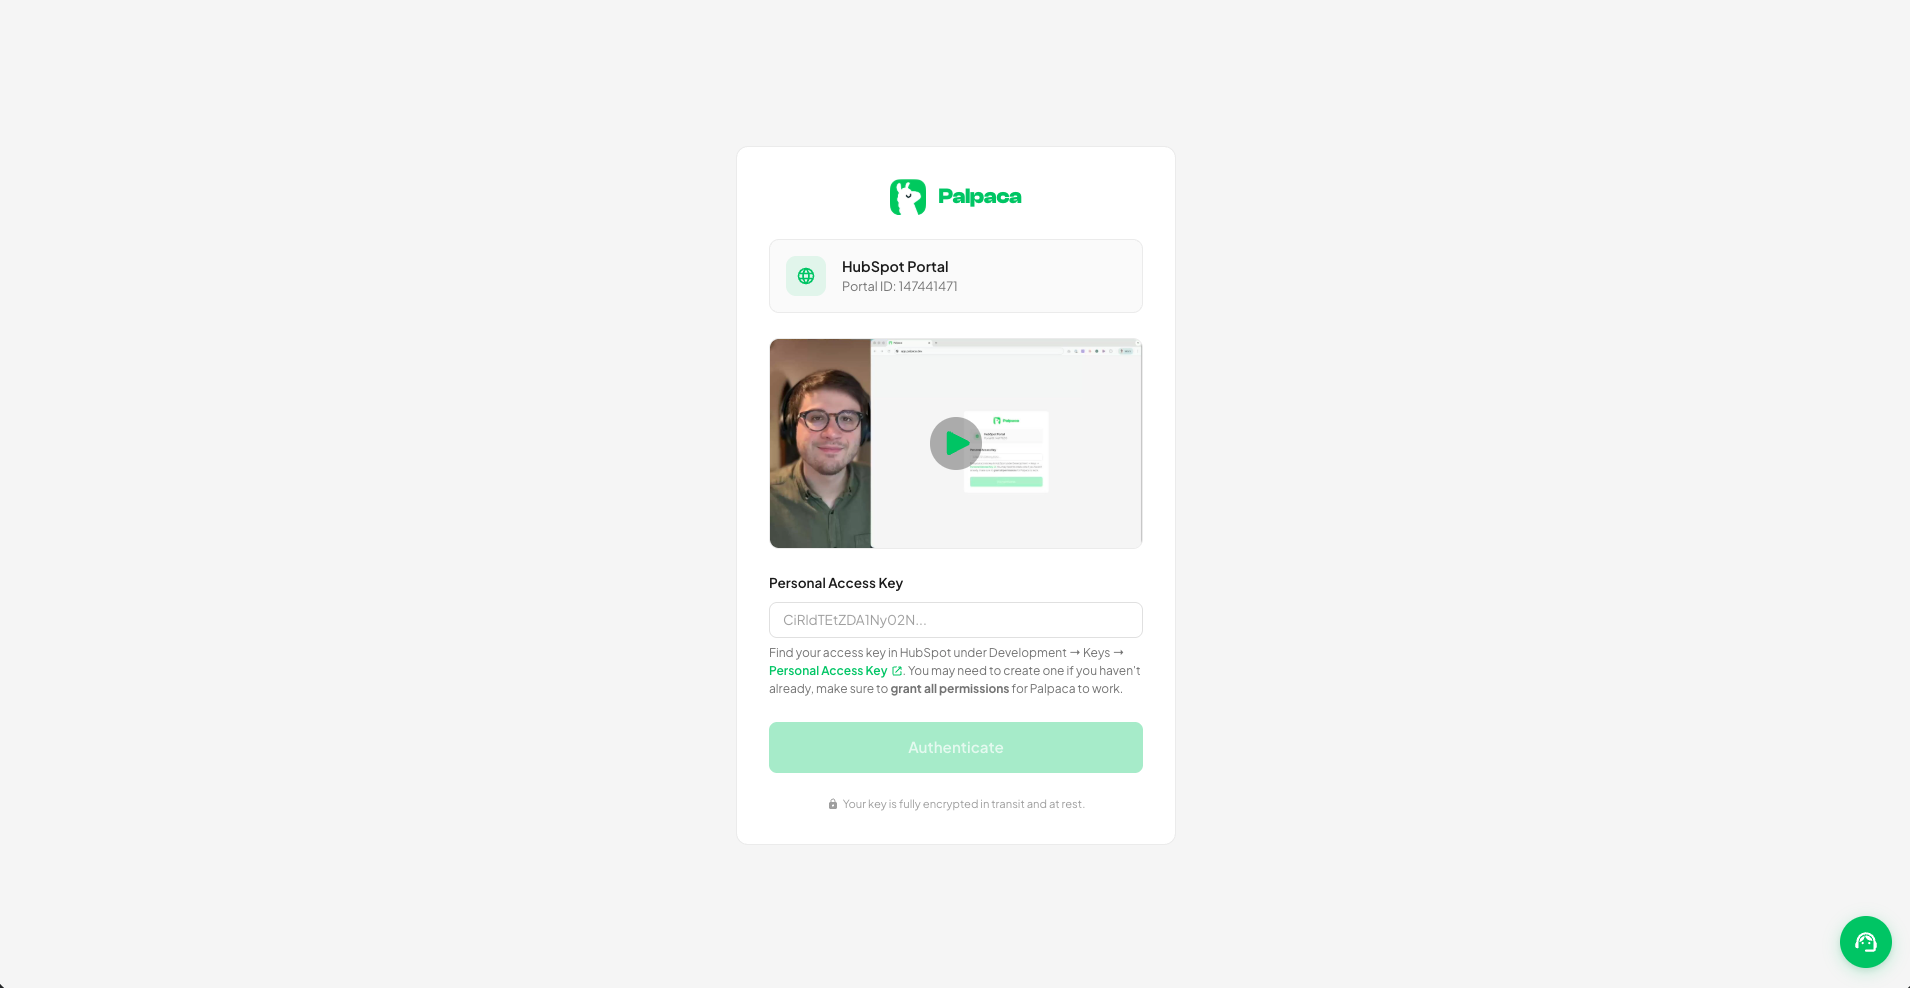
Step 2: Store your Personal Access Key
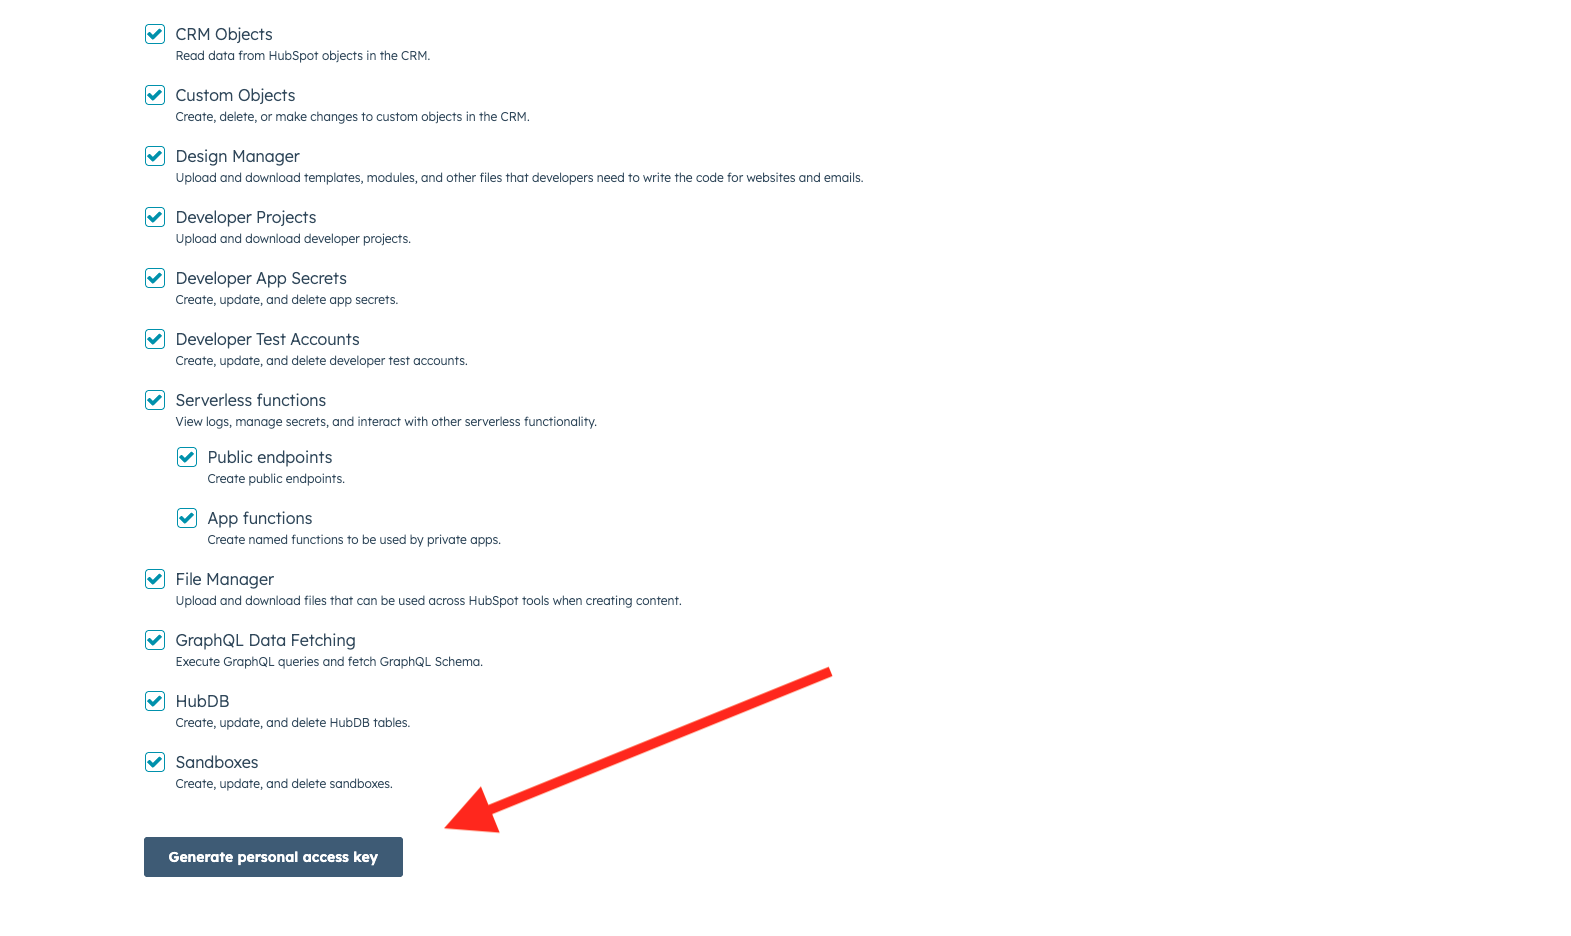
Next, Palpaca asks for your HubSpot Personal Access Key (PAK). To generate one, go to your HubSpot developer account under Development → Keys → Personal Access Key. Make sure all permissions are selected, then click Generate personal access key.
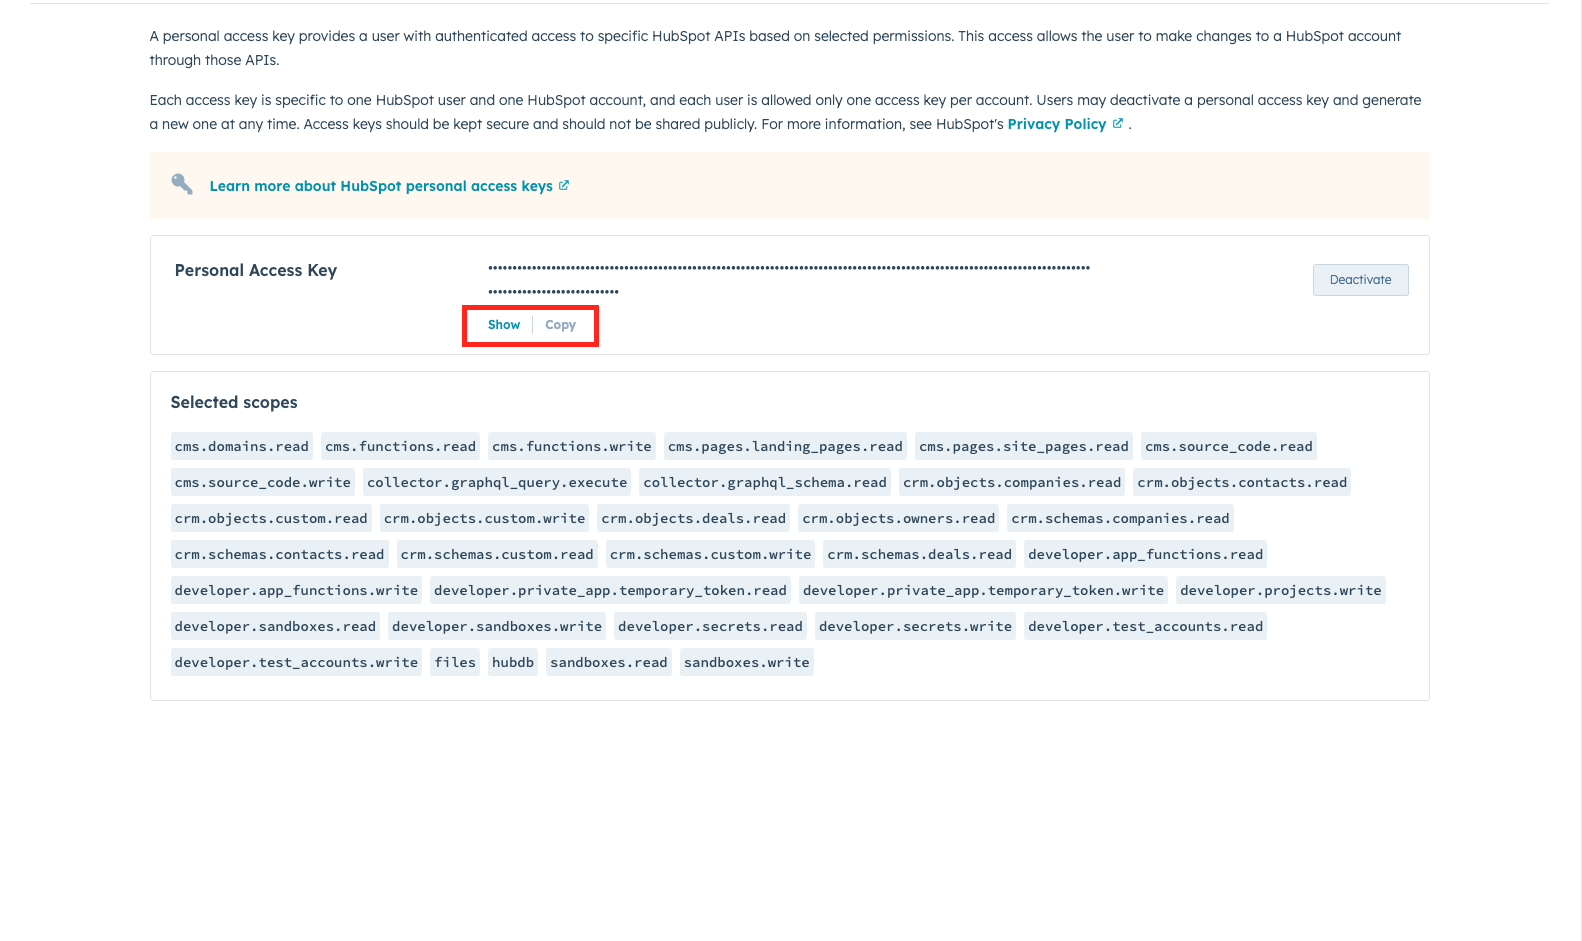
Once generated, click Copy to grab your key.
Head back to Palpaca, paste the key into the input field, and click Authenticate. Your key is fully encrypted in transit and at rest.
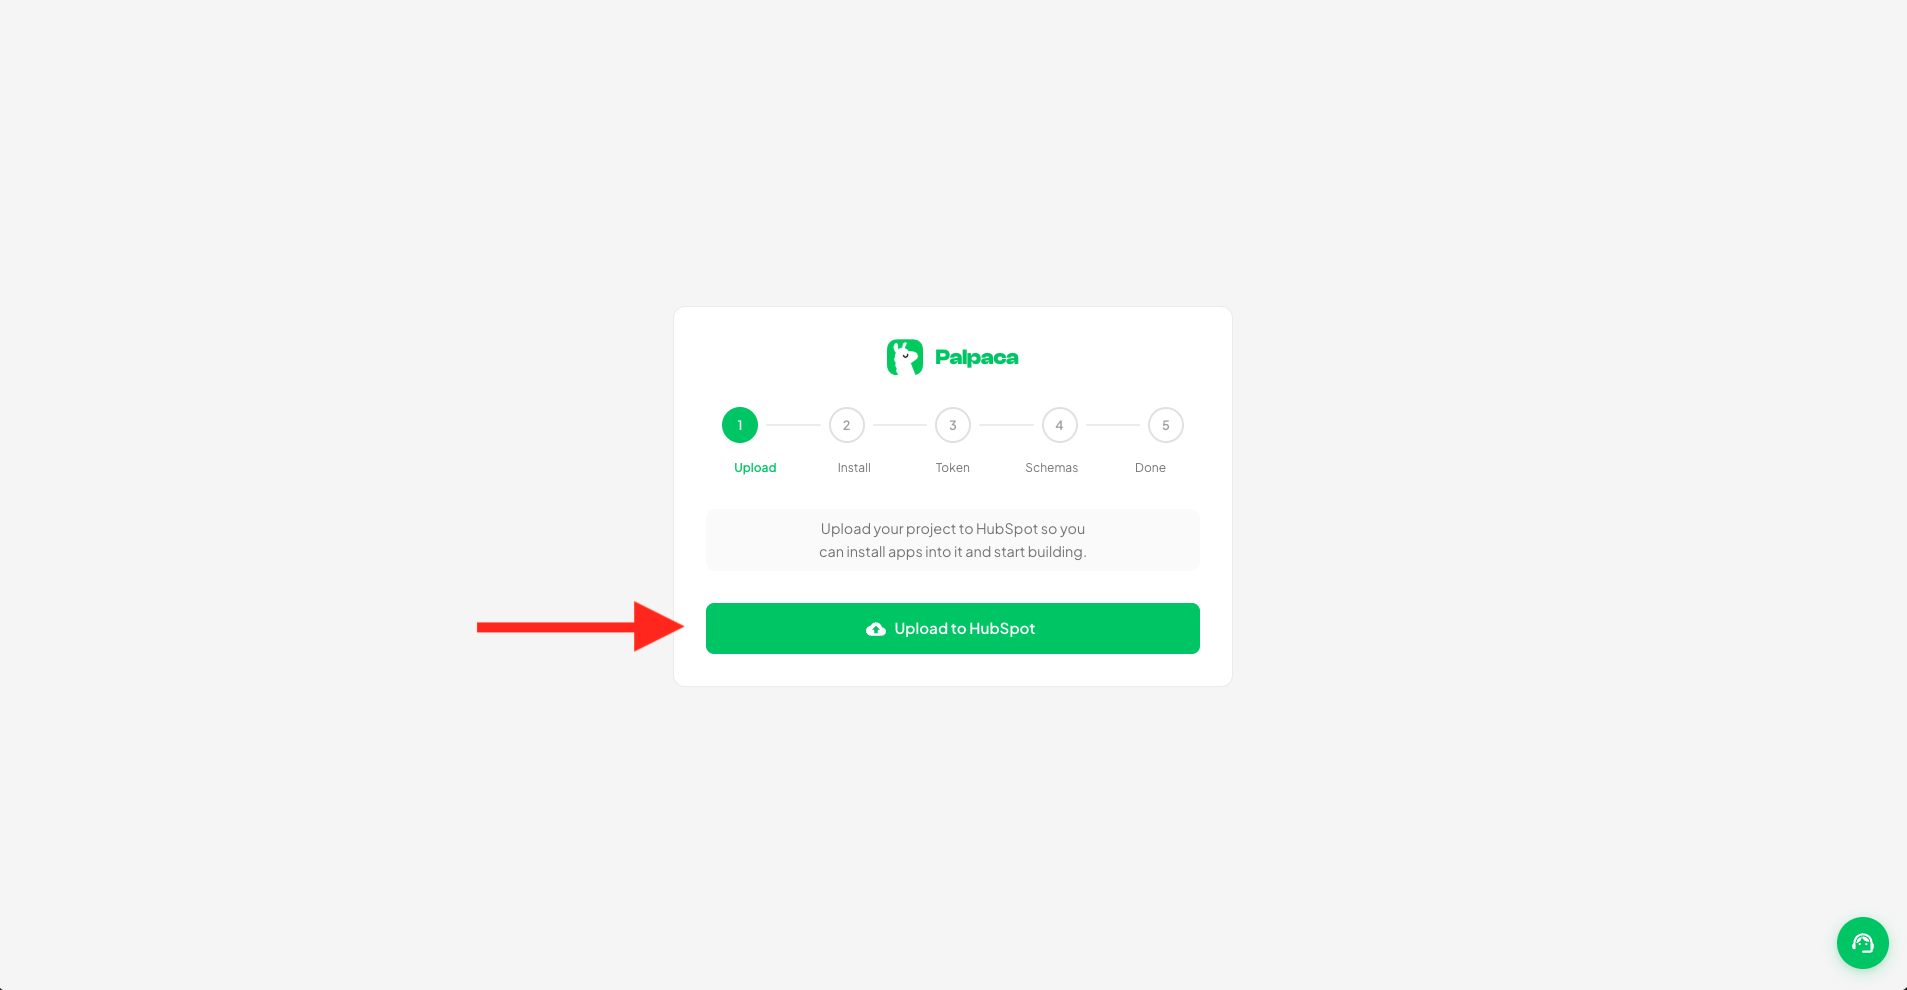
Step 3: Upload your project
Once your PAK is stored, Palpaca shows the setup wizard. The first step is uploading your project to HubSpot. Click Upload to HubSpot — Palpaca creates and deploys a HubSpot project to your developer account automatically.
The upload typically takes 30-60 seconds. You’ll see a progress indicator while Palpaca sets everything up.
Step 4: Add the App ID and install the app
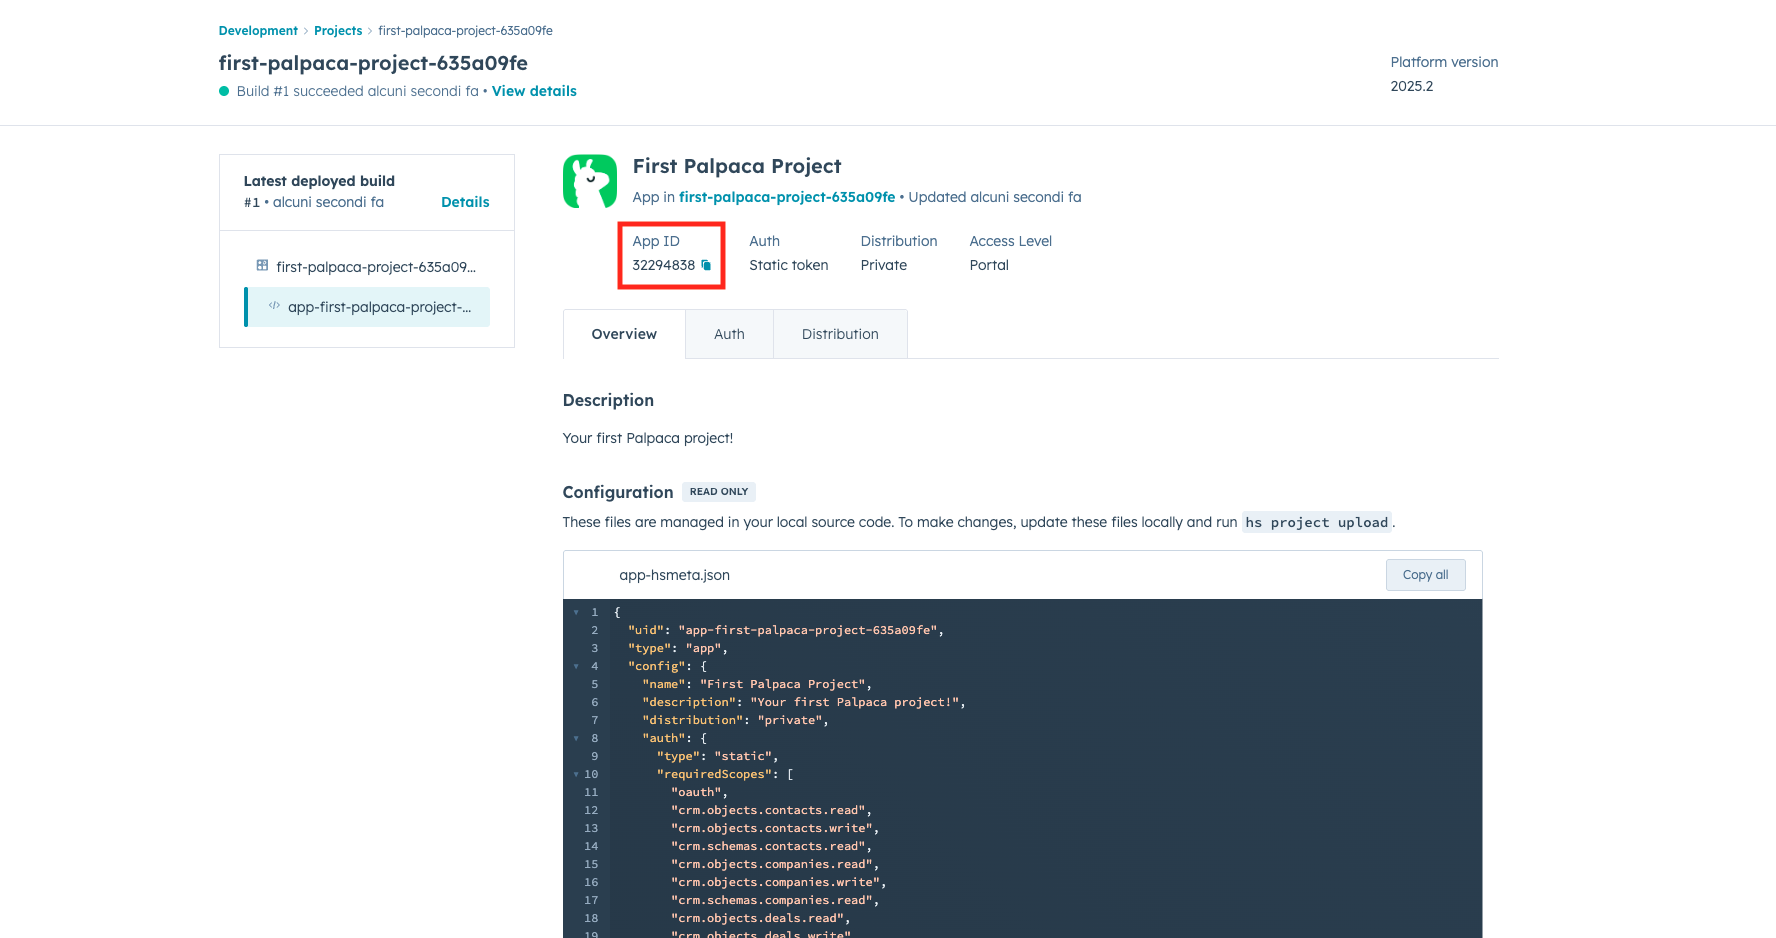
After the upload, Palpaca needs the App ID from the newly created HubSpot project. Click the project page link in the wizard to open it directly in HubSpot.
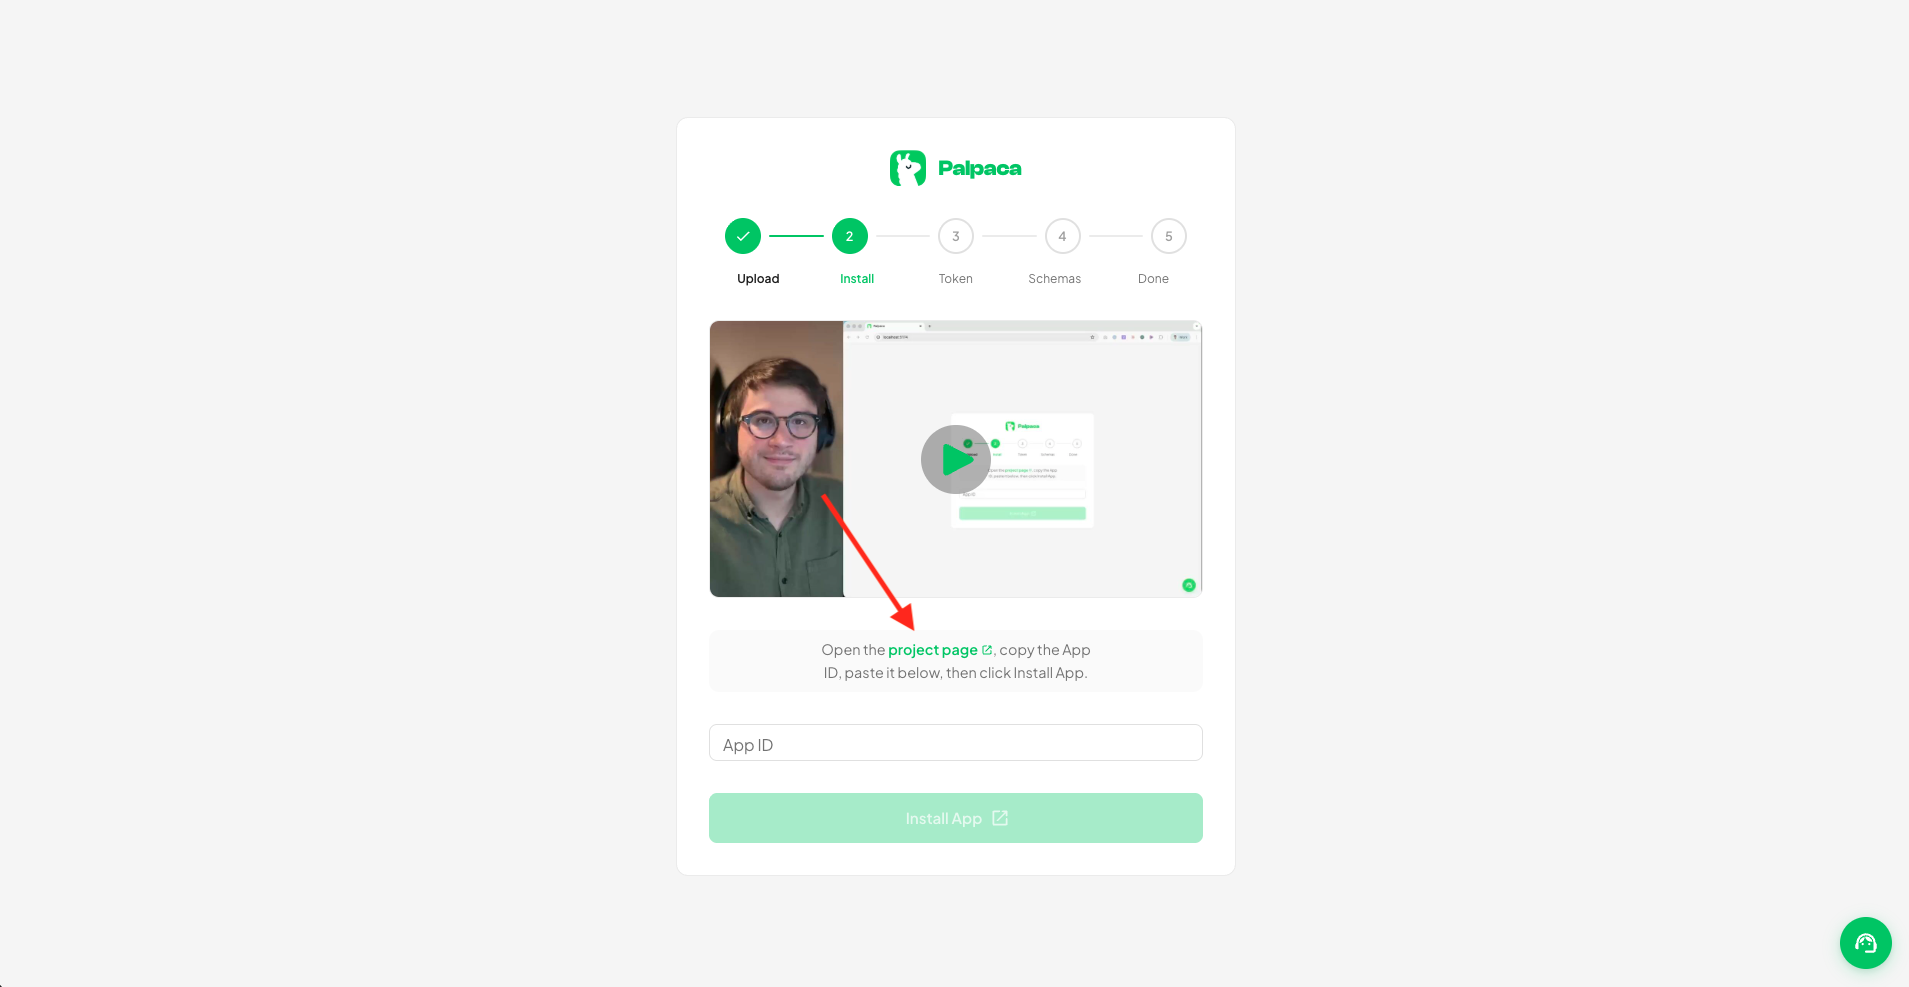
On the HubSpot project page, you’ll see the App ID near the top. Copy it, paste it into the Palpaca wizard, and click Install App.
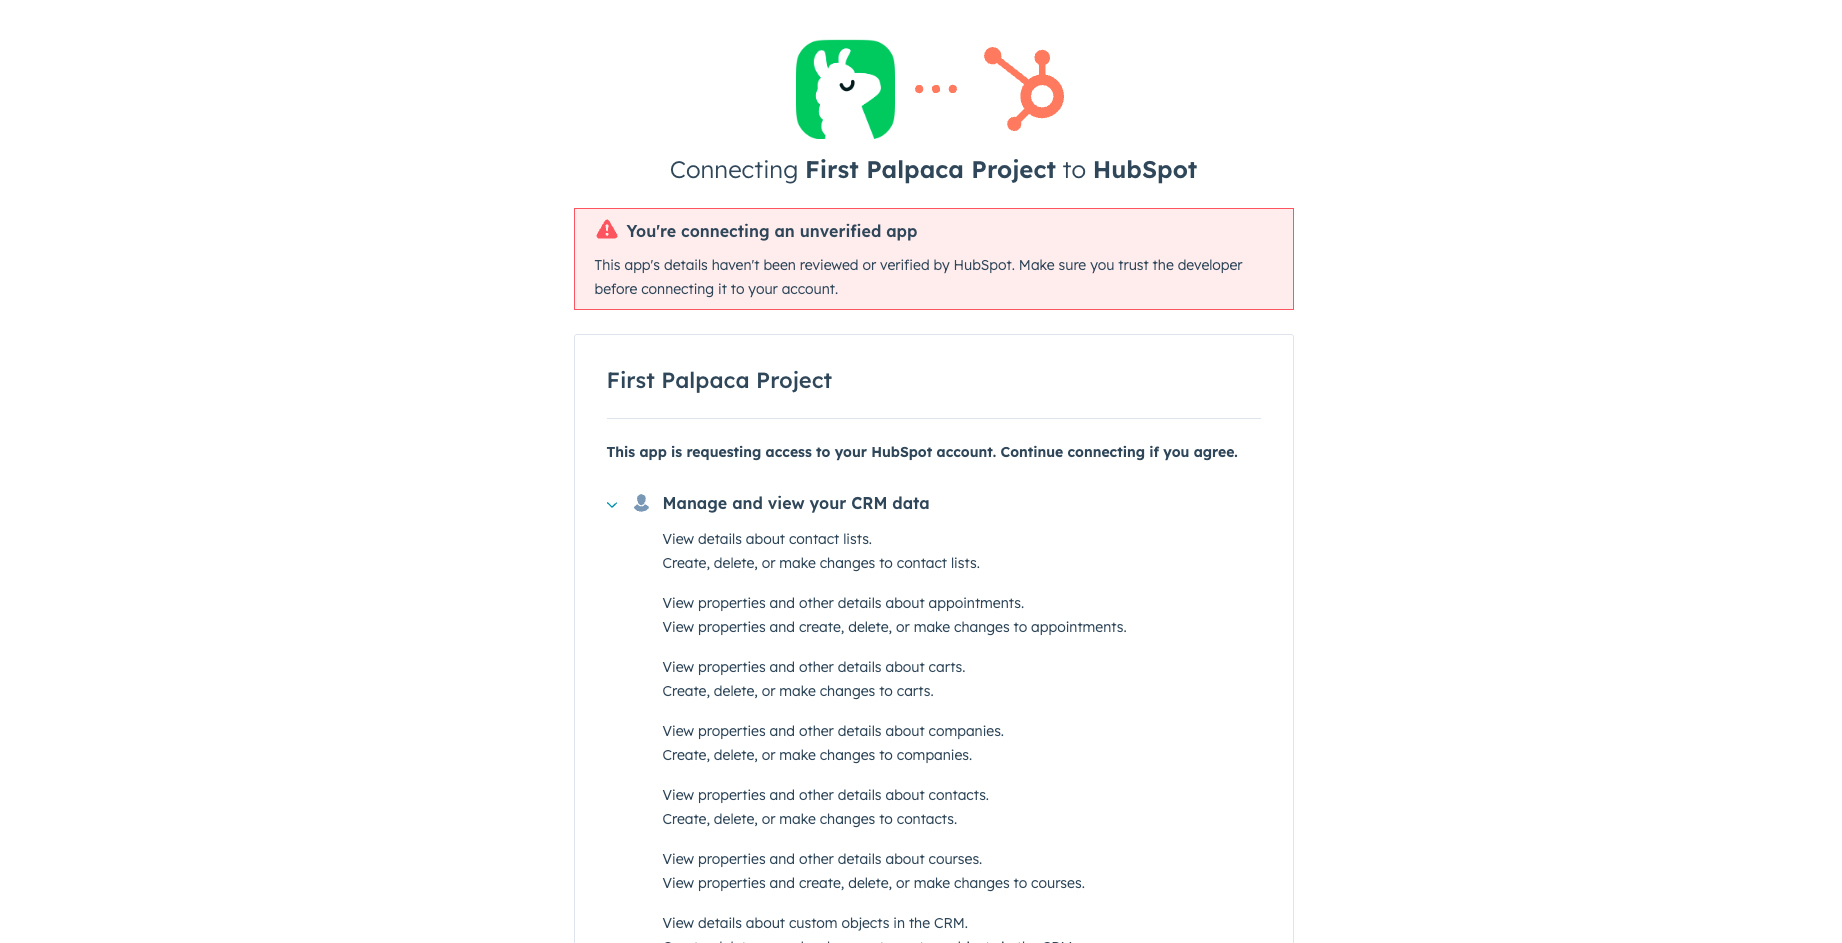
This opens the HubSpot install consent screen. Review the permissions your app is requesting, then scroll down and click Connect app to install it on your account.
Step 5: Save the Private Access Token
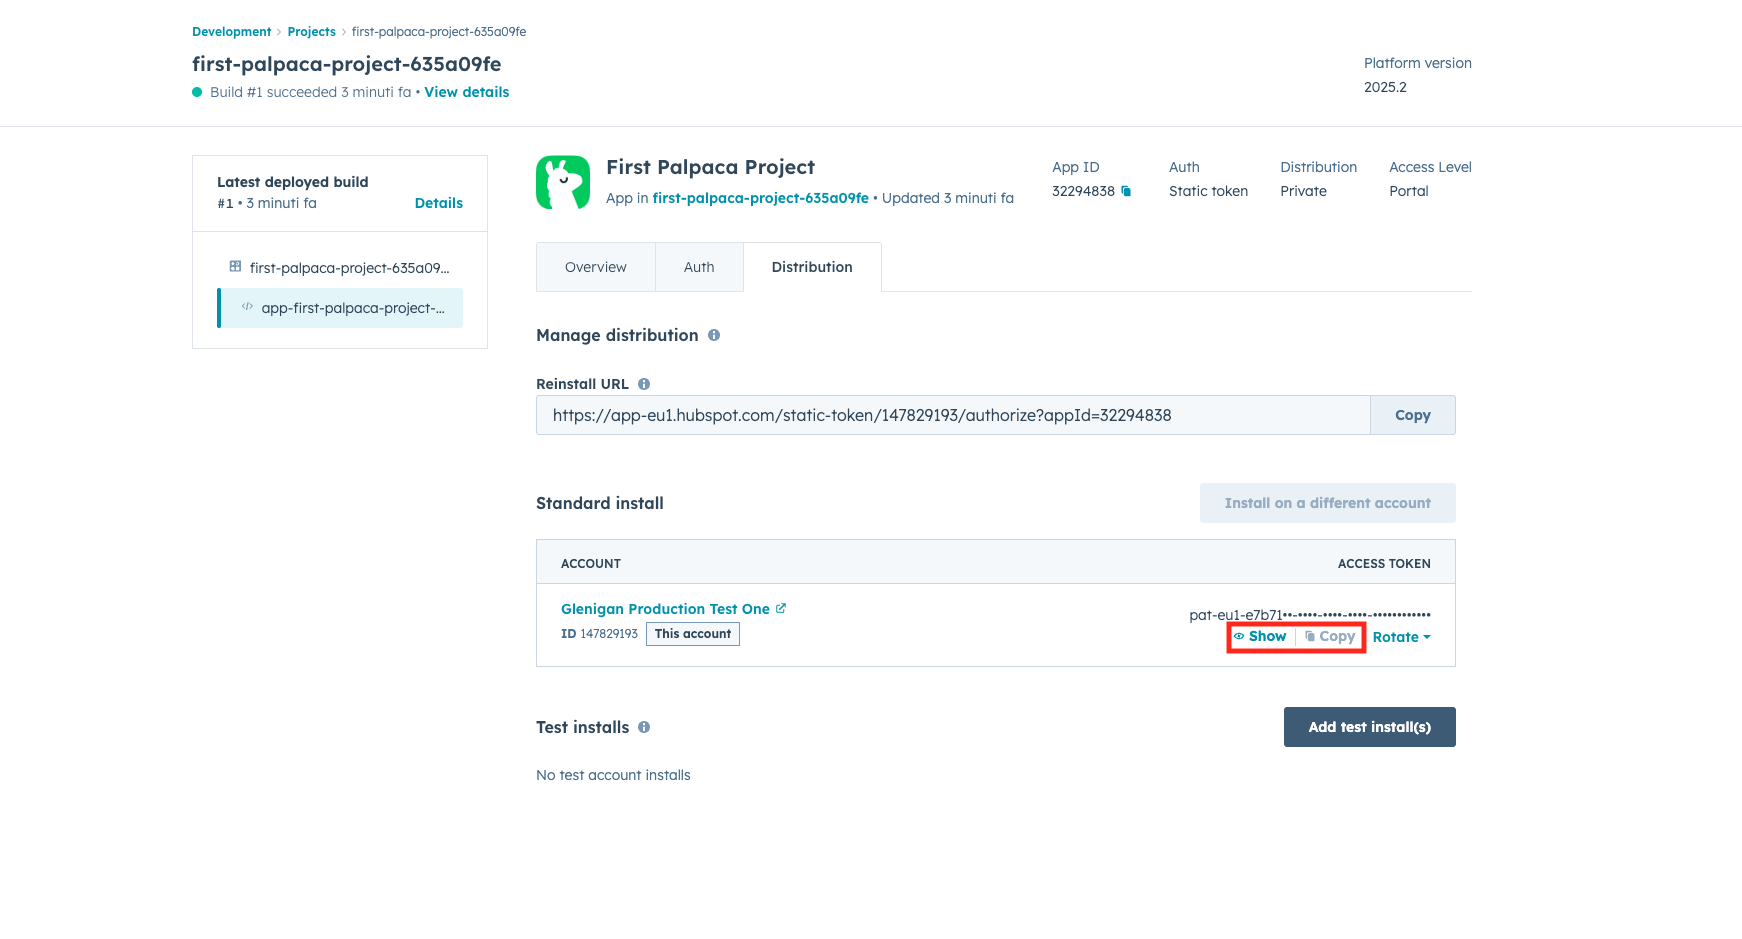
The wizard now asks for your Private Access Token. Click the distribution page link to open it in HubSpot.
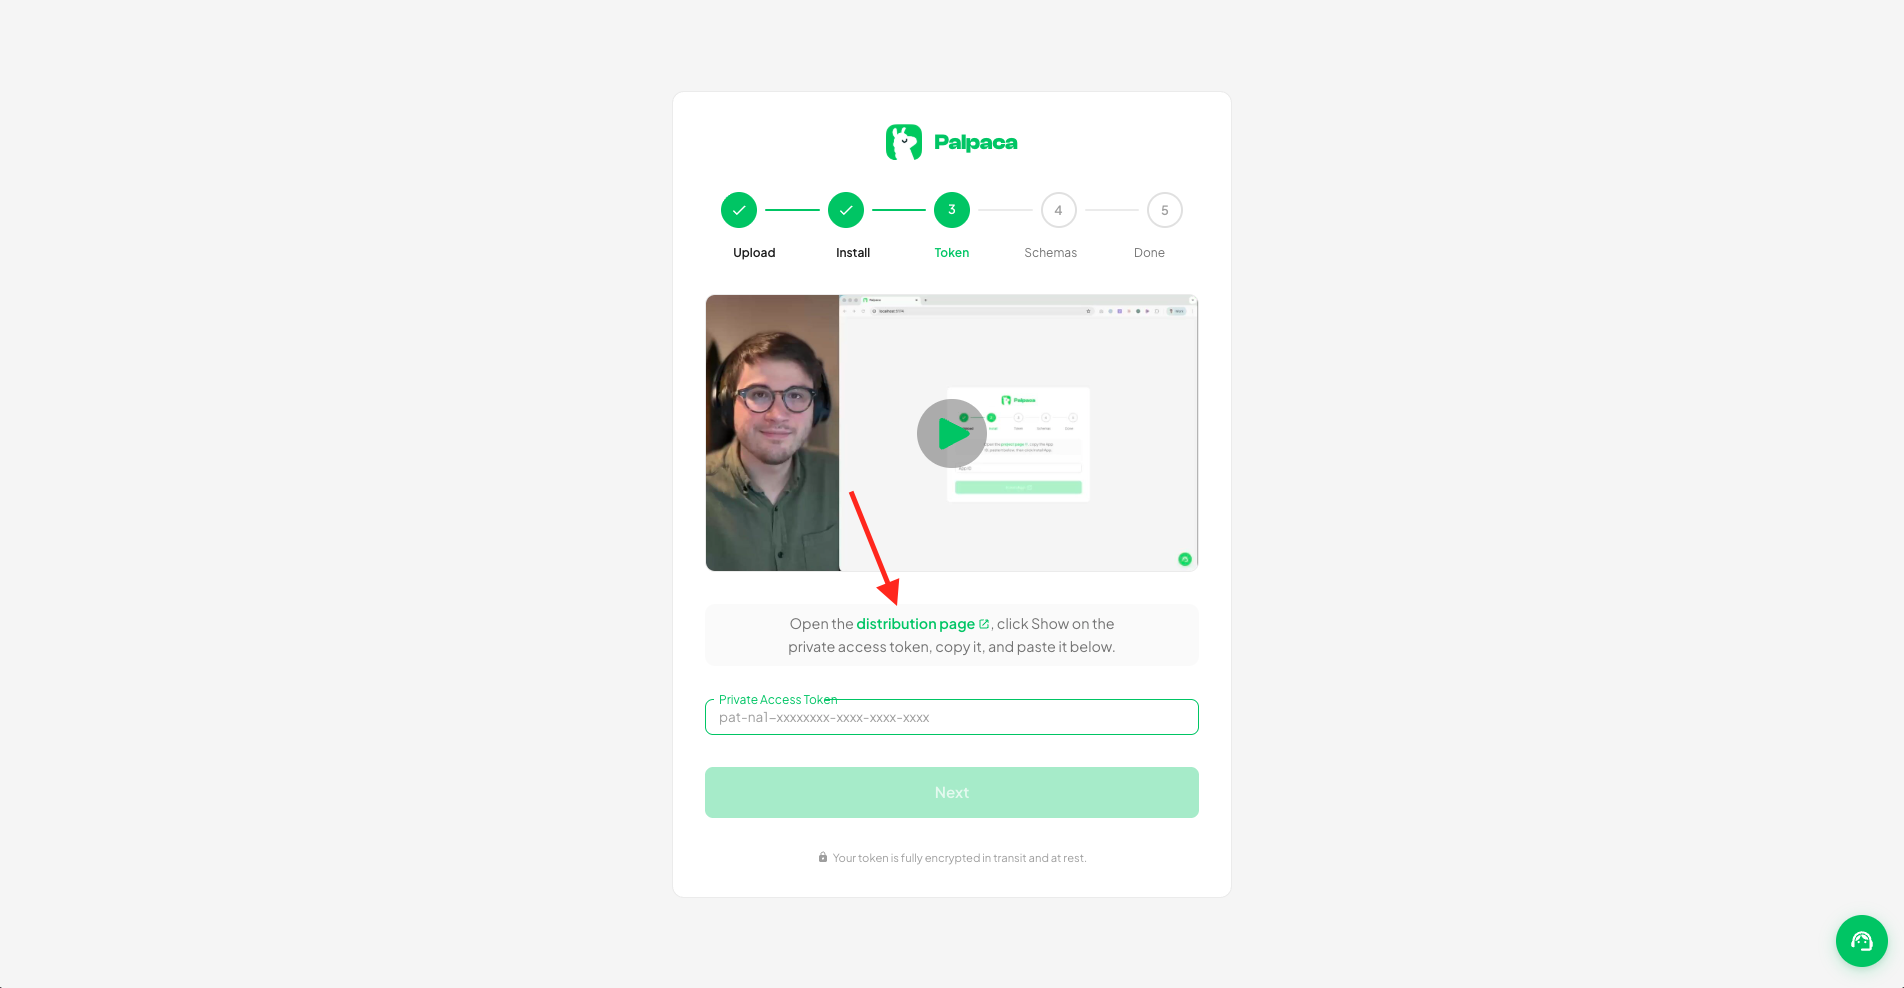
On the Distribution tab, find the Access Token for your installed account. Click Show to reveal it, then Copy. Paste it back into the Palpaca wizard and click Next.
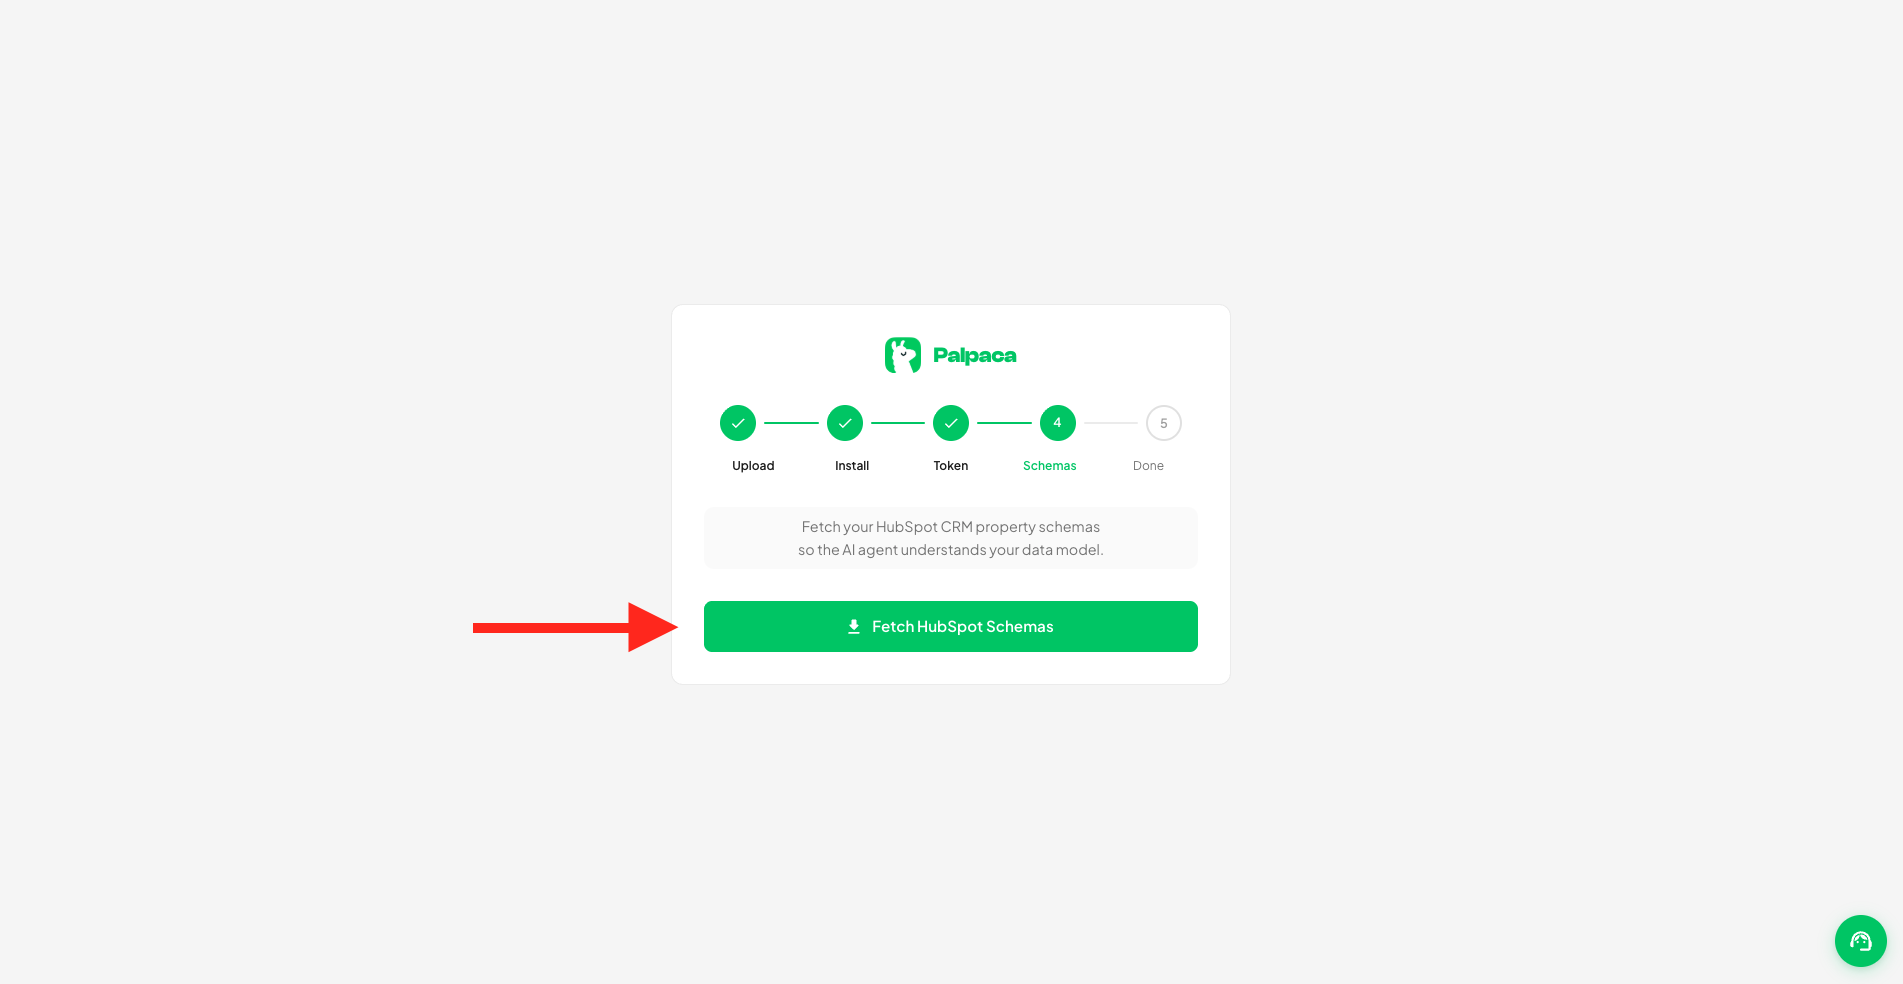
Step 6: Fetch schemas
The final step is pulling your CRM property schemas into Palpaca. Click Fetch HubSpot Schemas so the AI agent understands your data model.
Once the fetch completes, you’re done with the setup wizard and ready to start building.
What’s next
You’re all set. From here, you can start building custom CRM cards, actions, and workflows directly in Palpaca.
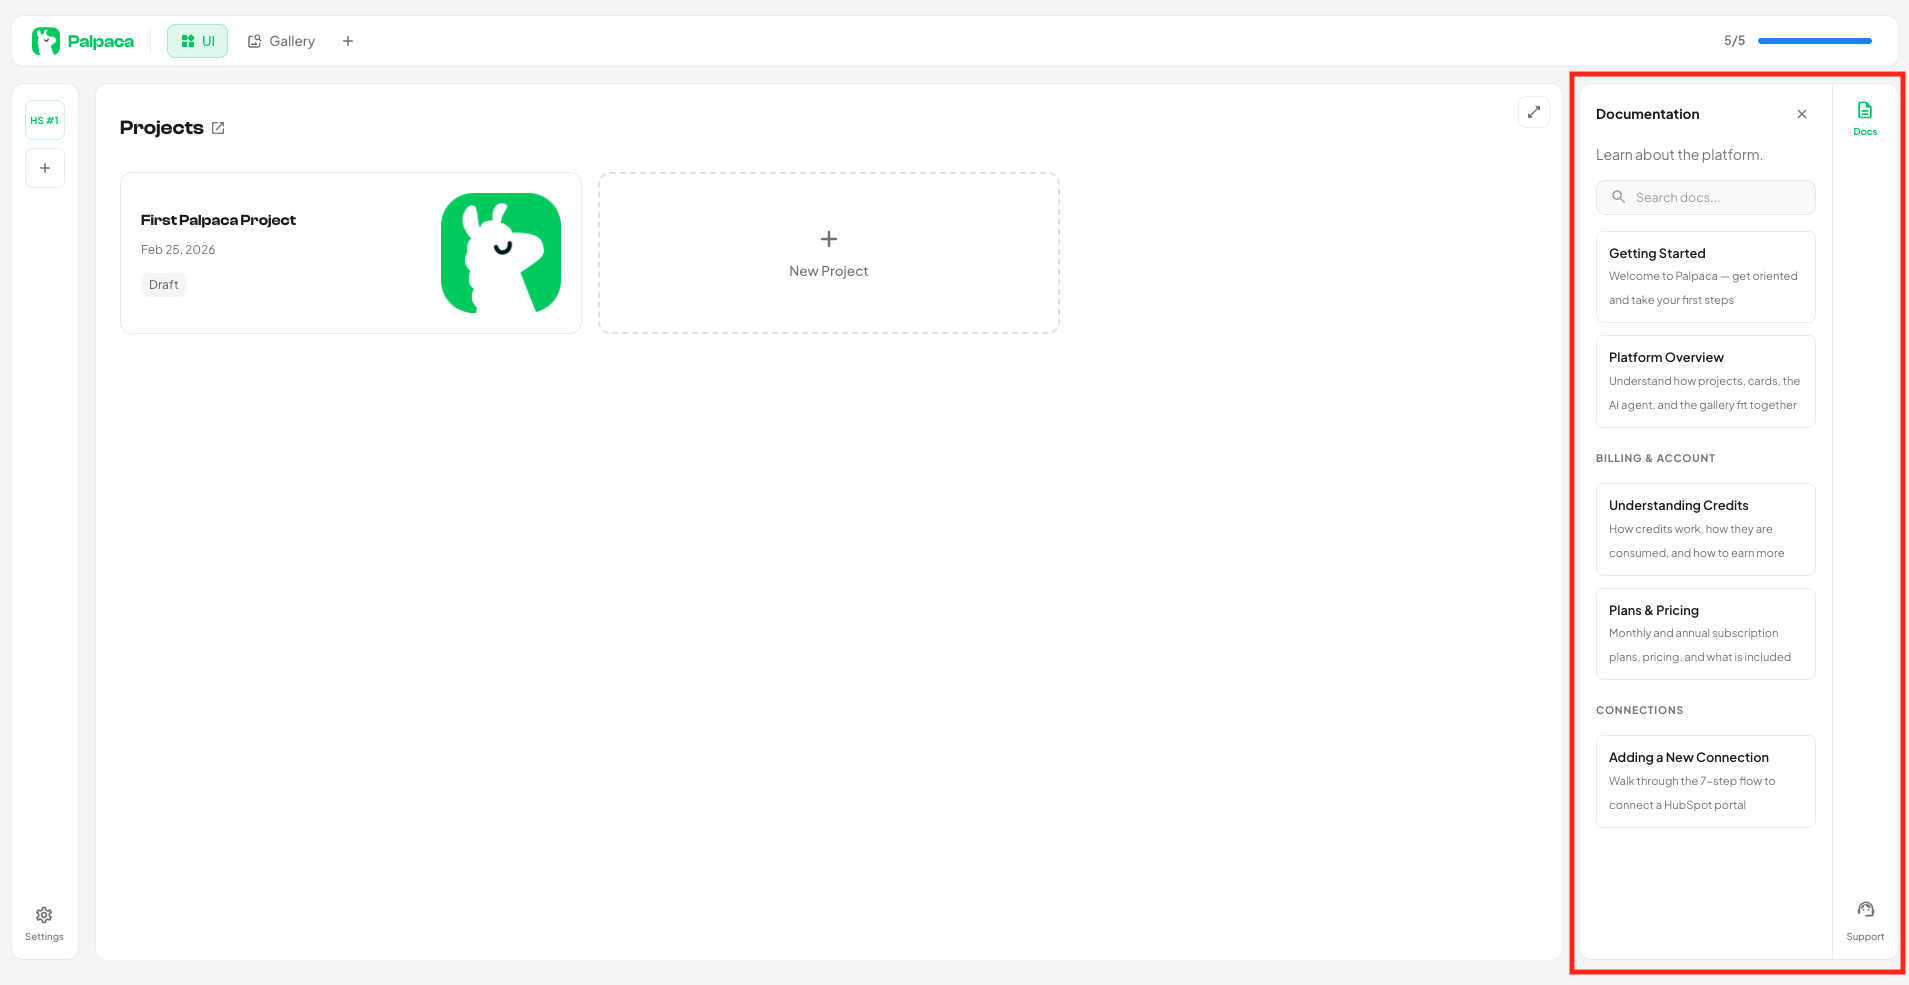
If you need help along the way, open the Docs panel on the right side of the dashboard. It has documentation on the platform, billing, connections, and more.